
High Fidelity Audio Setup for Sports Cars: A Good-Better-Best Guide
Quick Summary
A high fidelity audio setup for sports cars works best as a system: the cabin, components and listening position must work together. Small cabins boost bass, reflect treble and create uneven stereo imaging, so placement, tuning and sound deadening matter as much as speaker choice.
- Small sports-car cabins boost low frequencies, so subwoofer level should be set in the car at the driver's seat.
- Component speakers usually give the most accurate imaging because tweeters can be mounted high and aimed at the listener.
- Set polarity first, then crossovers, gain, time alignment and equalization, in that order.
- Sound deadening on doors and floor lowers road and engine noise, so the system needs less volume.
- Measure door cutout depth and window clearance before buying any speaker.
Table of Contents
- Why Sports Car Cabins Make High Fidelity Hard
- Choosing the Best Audiophile Car Speakers for Your Cabin
- High-End Car Audio Brands and Good-Better-Best Tiers
- Amplifier and Subwoofer Pairings for a Sports Car Build
- Car Audio System Tuning: From Source to Listening Position
- Car Audio Sound Quality Upgrades in Stages
- Book a Consultation to Match Your Sports Car Build
- Frequently Asked Questions
Why Sports Car Cabins Make High Fidelity Hard
A sports car is one of the toughest places to get clean, accurate sound, and the reason is acoustic rather than electrical. The cabin is small and the surfaces are hard. Good audio in one of these cars takes planning from the start, not just better speakers.
Most owners who are disappointed by their system blame the equipment first. Usually the cabin is the real culprit. Four mechanisms do most of the damage.
Cabin Gain and the Low-Frequency Problem
A small, sealed cabin boosts low frequencies at the bottom of the range. As cabin dimensions shrink, the frequency where that boost begins rises, so a sports car can add several decibels of emphasis in the lowest octave compared with a larger sedan. The practical result is bass that sounds strong in the driveway and boomy or one-note at speed, because the cabin is reinforcing a narrow band the subwoofer was never tuned for.
Early Reflections and Hard Interior Surfaces
Glass, metal and hard plastic reflect midrange and high frequencies almost perfectly. In a small cabin, those reflections reach the listener within a few milliseconds of the direct sound, which smears imaging and blurs the stereo picture. The closer the reflective surface to the speaker, the stronger the effect. A tweeter aimed across a glass hatch or a door woofer firing into a hard lower panel will produce a bright, fatiguing top end that owners often misdiagnose as a bad tweeter.
Path-Length Asymmetry and the Listening Position
In a sports car the driver sits close to the left door speaker and far from the right one, often with a difference of two feet or more between the two paths. Sound travels roughly one foot per millisecond, so the near speaker arrives several milliseconds before the far one, and it also arrives louder. The result is a stereo image pulled toward the driver's door and a center image that collapses.
Limited Mounting Depth and Awkward Angles
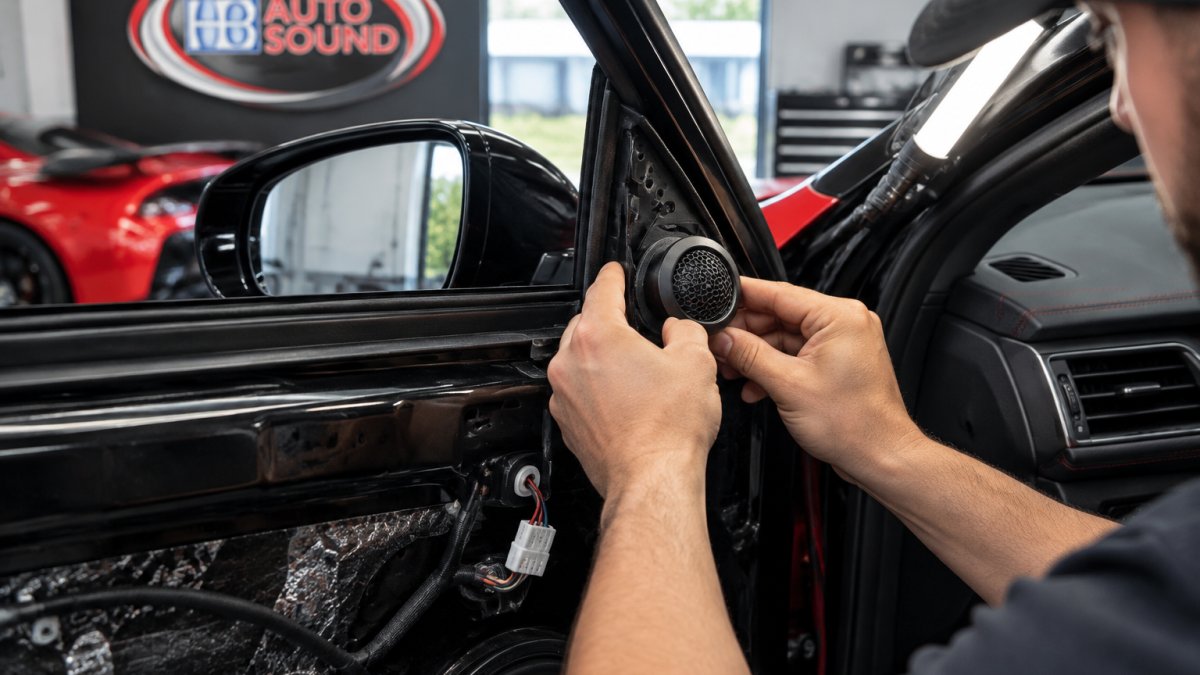
Sports-car doors are shallow, and the space behind the door card is often occupied by window tracks, crash structure and wiring. A deep woofer that fits a sedan door may not fit at all, and a tweeter that needs to be aimed at the listener may have no flat surface to sit on. Placement has to be confirmed before any purchase: measure cutout diameter, measure mounting depth, check window-down clearance, and decide where the tweeter can point toward the listening position.
Road and Engine Noise at Speed
Road and engine noise is the final obstacle. At highway speed, tire roar, wind and engine noise fill the frequencies where detail lives. A speaker that sounds rich in the driveway can turn thin and harsh at 70 miles per hour because the music is competing with the car around it. A common mistake is adding volume to beat the noise; that pushes distortion up and hides the detail you paid for.
Choosing the Best Audiophile Car Speakers for Your Cabin
Starting with the mounting constraints is a sound approach. Measuring the door cutout depth, checking for window clearance, and deciding where tweeters can be mounted shape the whole system more than the brand name on the box.
Watch out: a speaker with a high sensitivity rating needs less power, but sensitivity alone does not guarantee good sound. Match the speaker to the amplifier's output and the cabin's noise level.
!Technician fitting a component tweeter into a sports car door panel under a shop work light
High-End Car Audio Brands and Good-Better-Best Tiers
A good, better, best structure is a practical way to organize high-end car audio choices, with each tier built around reliability and customer satisfaction.
| Tier | What it delivers | Best for | Typical trade-off |
|---|---|---|---|
| Good | Clean, balanced sound with easy installation | Daily drivers and budget-conscious upgrades | Less detail at high volume |
| Better | Stronger imaging, better tweeters, more power headroom | Enthusiasts who want a noticeable step up | Requires proper sound deadening |
| Best | Precise imaging, wide soundstage, full-range accuracy | Owners who want a reference-quality cabin | Higher cost and more careful installation |
Good systems suit owners who want a clear improvement over factory audio without a full rebuild. Better systems add component speakers and a proper amplifier, and they reward a bit of sound deadening. Best systems combine component speakers, an external processor and a tuned amplifier chain for the most accurate result in a sports car cabin.
Best for: owners who want a tuned, reference-level sound stage in a performance car. Skip if: you mainly want louder bass and do not plan to tune the rest of the system.
Amplifier and Subwoofer Pairings for a Sports Car Build
Amplifier and subwoofer choices decide how much power and bass control your system has. Our installation services cover amplifier, subwoofer and speaker fitting, with free quotes available. Matching the amplifier's RMS rating to the speakers' rated power is generally more useful than chasing the highest peak number on the box.
For subwoofers, a sealed enclosure in a small trunk gives tight, controlled bass that suits a sports car. Ported enclosures can produce more output, but they need more space.
Car Audio System Tuning: From Source to Listening Position
Tuning brings the whole system together, from the audio source through to the listening position, and in a sports car it has to be done in a fixed order. Changing one setting after another without a sequence is how owners end up with a system that sounds different every day. The workflow below follows a sequence in which each step depends on the one before it.
Step 1: Confirm the Source and Signal Path
Start with a clean source. A high-quality digital-to-analog converter and a lossless file format keep detail intact before the signal reaches the amplifier. Confirm that the head unit or processor is not applying factory equalization or loudness curves that will fight your tuning later. If the car uses a factory amplifier, verify the integration interface is sending a full-range, unaltered signal; a clipped or pre-equalized input cannot be fixed downstream.
Step 2: Check Polarity Before Anything Else
A single reversed speaker will cancel bass and pull the image sideways, and no amount of equalization fixes it. Use a polarity check on every driver, one at a time, and confirm that a positive signal moves each cone outward. This takes a few minutes and prevents hours of chasing a problem that is really a wiring error.
Step 3: Set Crossovers
Set crossovers before gain. A high-pass filter around 80 Hz on the front and rear speakers keeps bass energy in the subwoofer, and a matching low-pass filter on the sub keeps the woofers from competing with it. In a small cabin, the crossover point often needs to be adjusted by ear and by measurement because cabin gain can make the sub sound louder than its measured output suggests.
Step 4: Set Gain Correctly
Turning the gain up is not the same as turning the volume up. Gain should match the head unit's output to the amplifier's input, and it should be set with the head unit at its maximum clean volume, not at a random level. Set gain last among the electrical adjustments, then check for distortion at your normal listening level. Under-powering a speaker causes clipping, which is far more damaging to sound quality than a slightly larger amplifier.
Step 5: Set Time Alignment and Level
Measure the distance from each driver to the driver's seat and enter those distances into the processor, or set delay manually. Then match levels channel by channel so the near-side speaker does not dominate. In a sports car the left-right asymmetry is large, so this step changes the image more than any equalizer setting. After alignment, recheck the center image with a mono vocal track; the voice should sit in front of the driver, not at the left door.
Step 6: Equalize to the Cabin, Not to a Curve
Equalization should correct the problems the cabin creates, not impose a generic target curve. Use narrow cuts to tame the peaks that cabin gain and early reflections produce, and avoid broad boosts that eat amplifier headroom. Measure at the driver's seat and the passenger seat, because a small cabin shifts the response noticeably between the two. Small changes in equalization and time alignment can shift the stereo image, so make one adjustment at a time and listen after each.
Step 7: Verify at Speed
A system tuned in a quiet bay will sound different at 70 miles per hour, when tire, wind and engine noise raise the noise floor. Check the balance at speed and decide whether the top end needs a small lift to stay clear without becoming harsh.
A repeatable workflow matters because it makes the result predictable. Set the source, check polarity, set crossovers, set gain, align time and level, equalize to the cabin, then verify at speed.
Car Audio Sound Quality Upgrades in Stages
A staged build spreads cost over time and lets each step be heard on its own. We usually recommend this order:
- Sound deadening on the doors and floor, to lower road and engine noise.
- Front component speakers for accurate imaging and clear vocals.
- A matching amplifier to give the speakers clean power.
- Source and processing upgrades, including a better head unit or external processor.
- Subwoofer and enclosure for bass that integrates with the front stage.
- Final tuning of crossovers, gain, time alignment and equalization.
This order matters because each step improves the one after it.
Book a Consultation to Match Your Sports Car Build
Every sports car is different, so the best system starts with a conversation about your car, your listening habits and your budget. At HB Auto Sound OC, our team can recommend the right components for how you use the car and the vehicle you drive, based on what you like to hear. Book a consultation to match your sports car build to talk through your options before any work begins.
Frequently Asked Questions
Do sports cars need a subwoofer for good sound?
Not always, but many sports car cabins benefit from one. Small interiors and hard surfaces make bass sound thin or boomy when the factory speakers try to reproduce low frequencies. A properly sized subwoofer, with a crossover set near 80 Hz and a 24 dB per octave slope, handles the low end so your speakers can focus on midrange and highs. Whether it fits depends on your cabin layout, trunk space, and how much low-end you want, which is something to confirm during a consultation before committing to an enclosure.
Should you upgrade car speakers or the head unit first?
For most sports car owners the speakers come first, because they set the character of the sound and the factory units are usually the weakest link. A better head unit with a clean digital-to-analog converter helps most once the speakers can resolve the detail it sends. If your budget is limited, start with component speakers and add an amplifier later. Your installer can confirm the sequence that suits your vehicle and the sound you prefer.
Can you improve a factory stereo without replacing every component?
Yes. Many owners keep the factory head unit and upgrade only the front speakers, adding an amplifier to drive them properly. Because every model handles this differently, a vehicle-specific assessment is the reliable way to know which components can stay and which need replacing.
How do you tune a car audio system for balanced sound?
Balanced tuning starts with setting gain correctly to avoid clipping, then adjusting crossovers so each speaker plays the frequencies it reproduces best. Time alignment and polarity checks keep the soundstage centered for the driver's seat. Tone controls come last, used lightly. Tuning is most effective when measured and adjusted at the actual listening position with the engine running, because road and engine noise change how the system sounds at speed.

Ready to Upgrade Your Ride?
Call us at (714) 842-1250 or visit us at 16732 Beach Blvd Ste A, Huntington Beach.
Get a Free Quote